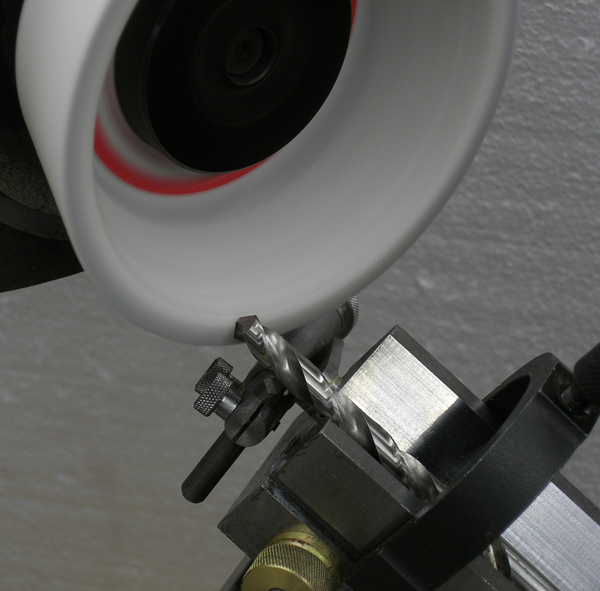
Grinding Lathe Tools
Tool grinding is part science and part art, but can be an enjoyable side activity to working with the lathe. My goal here is to teach beginners enough to get them started with a few basic tools. Here are some additional resources:
You can, of course, buy ready-made carbide-tipped cutting tools. If good quality, these work well and last a long time. The real advantage to grinding your own tools is not cost savings, but having the ability to make a tool for whatever purpose you may run across in your work. For example, I have made some very small boring tools from 3/16" tool blanks which are quite handy for boring out a small hole, say .373 in diameter, to press-fit a 3/8" shaft.
The essence of lathe tool grinding, as I think of it, is to undercut the tip of the tool to provide 'relief' so that the metal just below the cutting tip does not contact the work. This concentrates enough cutting force on the tip to cut into the metal of the workpiece.
Most of the regular cutting tools I make are undercut on the front and left edge of the tool. Since most tools are designed to cut while moving from right to left (towards the headstock) it is not necessary to provide relief on the right side of the tool. Additionally, I usually grind a similar relief, or rake, on the top surface of the tool.
When you order your lathe, be sure to order about 10 5/16" x 2 1/2" High Speed Steel (HSS) tool blanks. (Note: the older, non-Sieg, Homier/Speedway lathes use 3/8" x 2 1/2" tools) I usually get mine from Enco. They are normally about $1 each but often go on sale for about $0.80.
The four sides of the blank are ground to a smooth, shiny finish. The ends are a coarse finish with a preformed angle of about 15 degrees.


We will use a simple four-step procedure to make our cutting tool


Compiled by Rahul KP
- Grind the end relief
- Grind the left side relief
- Grind the top rake
- Round the tip
Grinding the End Relief
First we will grind the end of the tool blank. Use the coarse wheel of your bench grinder and hold the tool blank angled downwards from the tip to the rear and with the tip pointing to the left about 10-15 degrees.. The tip of the tool blank should be a little below the center line of the wheel.
Grinding causes the tool blank to get quite hot so you will need to dip the end of the tool into a water bath every 15 seconds or so during the grinding operation. When you see the tip of the tool start to discolor from the heat its a good time to make a cooling dip. Fortunately, HSS does not conduct the heat to your fingers very fast, but you can get burned if you go too long between cooling dips.
Here's a picture of the tool after grinding the end:
Grinding the Left Side Relief
Now we'll grind the left side of the tool. The procedure is essentially the same except that we hold the tool with the side at about a 10 degree angle to the grinding wheel.
Grinding the Top Rake
Now we grind the top surface to form the rake. Be careful during this operation not to grind down the cutting edge or you will end up with a tool whose tip is below the center line of the lathe. If this happens, the tool will leave a little nub at the center of the workpiece when you make a facing cut. The usual remedy is to use a thin piece of shim stock under the tool to bring it back up to the center line. A much nicer solution is an adjustable-height tool holder.
After this operation we have a working tool with a very sharp tip. This tool is useful as-is for operations that need a sharp tip to turn down to an interior edge such as a shoulder.
Rounding the Tip
We will round the tip to form a tool that is useful for facing and turning. Hold the tool so the tip touches the wheel and with the tool tilted downward. Rotate the tool against the wheel to round the tip to about a 1/32" radius.


Here's the finished tool in action making a finishing cut on a facing operation:
As a final step, you may wish to smooth the cutting tip on a fine diamond hone or oilstone. I've found that the tip tends to get smoothed pretty quickly after a few cuts, so I usually skip this step, but it does make a difference if you need a fine finish.
So now you know how to grind the most basic of cutting tools. There are many other types of tools that you can grind including shaping tools, cutoff tools and boring tools. Here's some additional info posted by Brian Pitt:
You usualy want to set the tool on center to about .003-.005 above center but almost never below (the workpiece will try to roll over the top and chatter) cutoff ,threading and most carbides should be on center while HSS for general turning can be a hair above to make up for the deflection of the workpiece and machine which will bring it back on center, it can also add a little burnishing action as the work rubs the front face of the bit and will give smoother finishes the side and top rake reduce the amount of cutting force and heat generated and help to control the chip by giving it a difrent angle to curl on depending on the material being cut , softer and stringier materials like aluminium and 1018 steel need more rake to give a knife like edge while materials that break up easily like brass and cast iron use less rake to keep the tool from digging in and grabbing
One of the most important facts often overlooked by beginners is that the cutting face of the grindstone wheel quickly becomes dulled and clogged with metal particles. To maintain an agressive cutting face it is essential to refurbish the wheel face frequently with a dressing tool. I use a dressing tool with a single industrial diamond point for this purpose. I got it from Enco for around $15. I use this tool to refresh the grinder wheel after about every 10 minutes of grinding time. It makes a big difference.
Here's some great information on various types of tool rake, posted by Dub Thornton:
No, rake angles and front relief are NOT the same. Front relief is the angle ground into the front of your tool which allows ONLY the front cutting edge to contact the workpiece. If the tool contacts the workpiece below the cutting edge, you will get a "rubbing" action, and the tool cannot bite into the workpiece. Side relief (or clearance) is the angle ground into the side of the tool which allows only the side cutting edge of the tool to contact the workpiece.
There are two rake angles, both on the top of the tool. Back Rake is the angle from the tip of the cutting tool toward the back of the tool. It may be either positive, neutral, or negative. If it slopes down from the tip of the tool toward the back of tool, it is positive rake, an upward slope would be negative rake, neutral is self explanatory.
Rake angles, particularly back rake, may be built into the tool holders. The old lantern type holders I grew up on usually had a positive back rake angle built in. This was a help when grinding your tools, as you did not have to grind any back rake into the tool itself. When grinding threads tho, a neutral back rake angle is desirable, thus one had to grind a negative rake angle (point of tool pointed downward) to compensate for the positive back rake angle built into the tool holders.
Side rake is the angle from the side cutting edge of the tool toward the opposite side of tool (across the top of the tool). It can also be ground for negative, neutral, or positive side rake. A negative rake angle is usually used for brittle materials, such as brass, which are notorious for "hogging in" as you cut. A positive rake angle would increase this "hogging in" action, while a negative rake angle will push the tool away from the work, eliminating the tendency to "hog in". "Hogging in" is an old term for the material grabbing the tool, pulling it into the material for a deeper cut than you are set up for. Backlash in your machine increases the possibility for such"hogging in". Many projects are spoiled, as well as tools broken, etc, by this action.
A very general rule of thumb. For heavy, roughing cuts, use less clearance and rake angles. This leaves more material in the cutting tool to withstand the pressures of heavy cutting, plus more "beef" in the tool, means more ability to carry heat away from the cutting edges. For finish cuts, and turning such "soft" materials as aluminum, use more clearance and more rake angles for a better finish. I have seen may references on this reflector to Top Rake, which is confusing to me, as it does not define whether side rake, or back rake is being referred to.
Compiled by Rahul KP